File Upload with Multer in Node.js and Express
AfterAcademy Tech
•
09 Mar 2020

File upload is a common operation for any applications. In Node.js, with the Express web framework and the Multer library, adding file upload feature to your app is very easy. In this tutorial, we are going to learn how to upload files on the server with the help of Multer and Express in Node.js. The goal is to make you comfortable in building apps that can easily handle any file uploads. At the end of this blog, you will be able to integrate the file uploads in your own apps.
We will be covering the following topics:
- What is Multer?
- Project Setup
- Install the dependencies
- Testing Our API Using Postman
- Adding Multer
- DiskStorage
- Other Options in Upload
- Uploading Multiple Files
What is Multer?
Multer is a node.js middleware for handling multipart/form-data, which is primarily used for uploading files. It is written on top of the busyboy, for maximum efficiency. By this, you can understand that multer is used to handle multipart/form-data.
What is Multipart Data?
In general, when a “form” is submitted, browsers use “application-xx-www-form-urlencoded” content-type. This type contains only a list of keys and values and therefore are not capable of uploading files. Whereas, when you configure your form to use “multipart/form-data” content-type, browsers will create a “multipart” message where each part will contain a field of the form. A multipart message will consist of text input and file input. This way using multipart/form-data you can upload files.
Multer adds a body object and a file or files object to the request object. The body object contains the values of the text fields of the form, the file or files object contains the files uploaded via the form.
Multer will not process any form which is not multipart (multipart/form-data).
Project Setup
Create a directory for the project and give it any name. We will call it MulterApp.
Now, let’s start by first defining the package.json file to store our app’s configuration. To create one, navigate to the MulterApp directory in terminal, and write the following command:
// In command prompt or terminal
npm init
Answer a few questions (app name, git repo, etc…) and you’ll be ready to roll.
Install the dependencies
Here, the only two dependencies are express and multer. So we will install it one by one via npm(Node Package Manager).
// installing express module
npm install express --save
We are now ready to write some code. Create a file with any name of your choice, we will call it app.js. Load the express module using require() method and then set up a basic express server by writing the following code in app.js.
// load express
const express = require('express');
const app = express();
app.get(‘/’, (req, res) => {
   res.send(‘hello world’);
});
app.listen(3000, () => {
    console.log('Started on port 3000');
});
Now run the code by writing the following command in the terminal:
node app.js
After this, open the browser and type http://localhost:3000.
You should see “Hello World” printing to the document window. We have set up the basic server.
Testing Our API Using Postman
Postman is an essential and fantastic tool if you are building rest API. We will use Postman to test our routes. As we are not using any form tag or frontend therefore we will make requests and specify our form data from Postman only. So, make sure that you have Postman installed. Now let's add multer to our project.
Adding Multer
Before using multer, we have to install it using npm.
// installing multer module
npm install multer --save
In this project, we will store the uploaded files in a folder for simplicity. Usually we store the files in the Amazon S3 bucket.
We will now load multer in the app.js file using the require() method. The following code will go in the app.js file.
const multer = require('multer');
const upload = multer({dest:'uploads/'}).single("demo_image");
Here, we have called the multer() method. It accepts an options object, with dest property, which tells Multer where to upload the files. If you omit this object, the files will be kept in memory and never written to disk.
Once this is done, We will now create our post route. We will make a POST request to the URL [localhost:port/image]. For that, we will first have to listen to that endpoint and we will do that by using the post() method.
Here we are making a post request because, in the actual scenario also, It will be a post request only, as the form tag will going to post this data to a specific URL(by specifying method=”POST” and action=”/image” in form tag).
The following code will go in app.js:
app.post("/image", (req, res) => {
   upload(req, res, (err) => {
    if(err) {
      res.status(400).send("Something went wrong!");
    }
    res.send(req.file);
  });
});
Multer supports uploading a single file as well as multiple files. In this case, we have used multer({..}).single() which is used for uploading a single file. As I have mentioned before that the multer adds a file object to the request. The file object contains metadata related to the file.
Now we will be using Postman to test this endpoint.
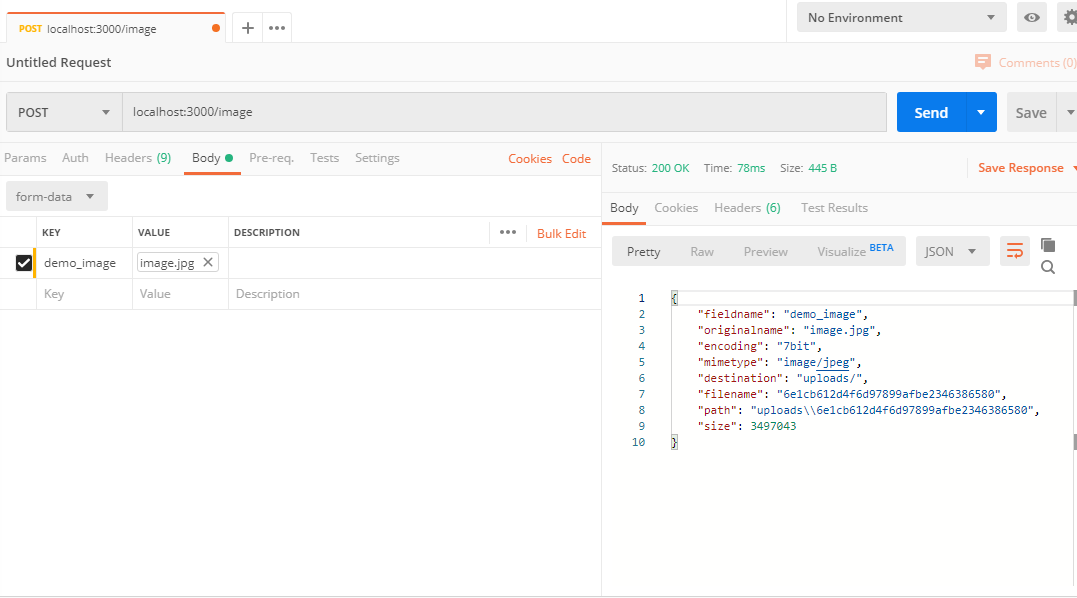
Here note that the key name or the field name that you are providing in form data should be the same as the one provided in the multer({..}).single() (here name is demo_image).
Now see your file structure again, notice that uploads folder is created in the location provided in dest option(in our case in the project directory). If you want more controls over the uploads we will use the storage option instead of dest.
DiskStorage
The disk storage engine gives you full control over storing files to disk. We will create a storage object using the diskStorage() method.
The following code will go in app.js:
var storage = multer.diskStorage({
   destination: function(req, file, cb) {
      cb(null, './uploads');
   },
   filename: function (req, file, cb) {
      cb(null , file.originalname);
   }
});
Here, there are two properties, destination, and filename. They both are functions.
destination - It can also be given as a string (e.g. './uploads'). If no destination is given, the operating system's default directory for temporary files is used. It is mandatory to create a directory when you are using destination as a function. Otherwise, if you are using destination as a string, multer will make sure that the directory is created for you.
filename - It is used to determine what the file should be named inside the folder. If you don't provide any filename, each file will be given a random name without any file extension. It is your responsibility to provide a function that should return a complete filename with a file extension. Both these functions take 3 arguments - the request object, the file object and a callback function (here, cb is callback function). The 2 arguments to cb are:
- null - as we don’t want to show any error.
- file.originalname - here, we have used the same name of the file as they were uploaded. You can use any name of your choice.
Now let’s modify the variable a little bit.
// In app.js
var upload = multer({ storage: storage }).single("demo_image");
Again test this in Postman. You will find the same output but now check the image in the uploads folder. You will find the same filename as you uploaded, with the proper extension.
Other Options in Upload
- limits - You can also put a limit on the size of the file that is being uploaded with the help of using limits.
The following code will go inside the multer().
// inside multer({}), file upto only 1MB can be uploaded
const upload = multer({
       storage: storage,
       limits : {fileSize : 1000000}
});
Here, fileSize is in bytes. (1000000 bytes = 1MB)
2. fileFilter - Set this to a function to control which files should be uploaded and which should be skipped. The function should look like this:
// this code goes inside the object passed to multer()
function fileFilter (req, file, cb) {
   // The function should call `cb` with a boolean
   // to indicate if the file should be accepted

   // To reject this file pass `false`, like so:
   cb(null, false);
   // To accept the file pass `true`, like so:
   cb(null, true);
   // You can always pass an error if something goes wrong:
   cb(new Error('I don\'t have a clue!'));
}
For Example, if we only want the user to upload the image file (jpeg, jpg, png, gif).
Then the code will look like this and will go in app.js:
// this code goes inside the object passed to multer()
function fileFilter (req, file, cb) {
  // Allowed ext
   const filetypes = /jpeg|jpg|png|gif/;

 // Check ext
  const extname =  filetypes.test(path.extname(file.originalname).toLowerCase());
 // Check mime
 const mimetype = filetypes.test(file.mimetype);

 if(mimetype && extname){
     return cb(null,true);
 } else {
     cb('Error: Images Only!');
 }
}
Uploading Multiple Files
We can upload multiple files as well. In this case, multer gives us another function called .arrays(fieldname[, max_count]) that accepts an array of files, all with the name fieldname. It generates an error if more than max_count files are uploaded. The array of files will be stored in req.files.
The following code will go in app.js
// uploading multiple images together
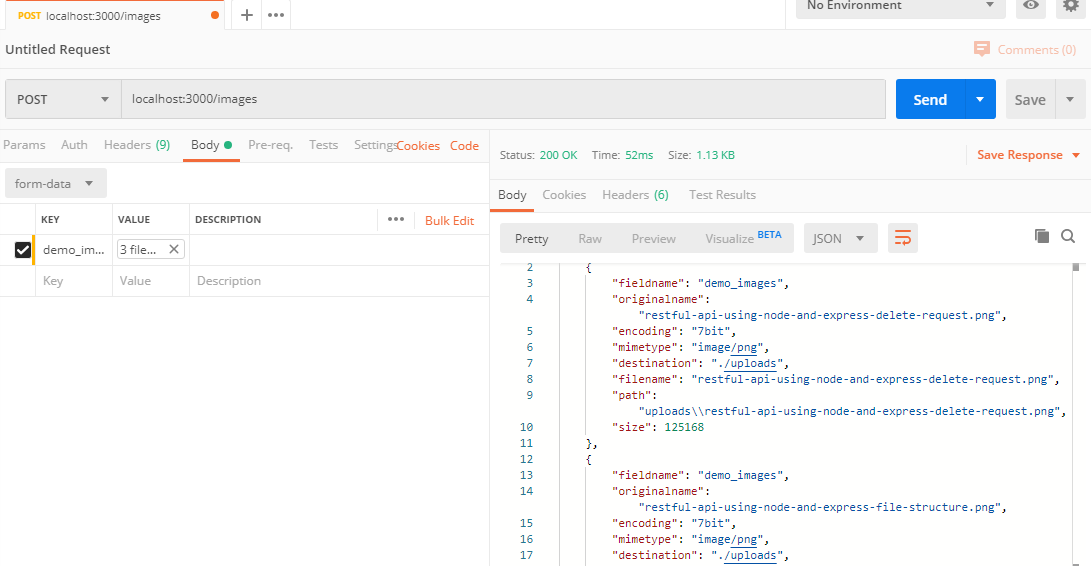
app.post("/images", upload.array("demo_images", 4), (req, res) =>{
try {
res.send(req.files);
} catch (error) {
console.log(error);
res.send(400);
}
});
Go to Postman, enter the specified URL, select multiple files and then press Enter.
Closing Notes
Now, we know how to integrate file uploads using multer in any application. Go ahead! make your own application with complete frontend and integrate the file uploads by using the above-acquired knowledge.
Keep Learning 🙂
Team AfterAcademy!!
Written by AfterAcademy Tech
Share this article and spread the knowledge
Read Similar Articles
AfterAcademy Tech
Introduction to Node.js - How Node.js works?
In this article we will explore the core structures of the Node.js architecture. Node.js is a popular framework for building backend systems (network applications) which can scale very well. Node.js is a Javascript runtime based on Chrome V8 engine.
AfterAcademy Tech
RESTful API Using Node and Express
In this tutorial, we will learn to build the RESTful API using Node and Express. The goal is to make you comfortable in building your RESTful API with Node.js and Express. At the end of this blog, you will be able to build your REST APIs using Node.js and Express.
AfterAcademy Tech
Getting started with Express.js
In this tutorial, we are going to learn about Express.js, why it is used, what all features it offers, and how it is used in the development environment. This tutorial will provide you with the most basic and important knowledge that is required in order to use Express in web application servers.

AfterAcademy Tech
Learn Debugging Node.js Applications
Most programming languages have their own debuggers supported by IDEs but Javascript is a scripting language, therefore, it doesn’t have an inbuilt full-featured debugger. We will discuss more on how to debug Node.js Applications.
