Can you connect two computers for file sharing without using a hub or router?
Suppose you have to share files between the computers at your home. So we want to connect these computers and share our files easily. This can be done in many ways. The first way to connect them is with the hub or router. But why to spend money on the new hardware and do complex network settings when this can easily be done in an inexpensive way with minimal network settings. Yes, you heard it right. We can connect two computers for file sharing without using a hub or router. But, how can this be done? In this blog, we will learn this. So, let's get started.
We can connect two computers for file sharing with the help of only one cable. This can be done using a commonly available Ethernet crossover cable . All you need to do is to assign both two computers to work as a default gateway to each other. A default gateway is a path used by the computer to send the data when it does not know a specified path to send it to the destination. We will see how this is done in windows as we go through this blog.
An Ethernet crossover cable looks like the picture below:
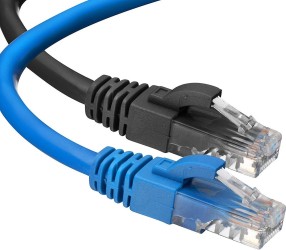
Image Source : Amazon.com
So, we will now see step by step how this is done.
- Connect one end of the cable to the network adapter of the first computer and the other end of the cable to the network adapter of the second computer.
- We need to perform step 2 to step 13 in the first Computer. Open the Control Panel in the first Computer.
- Click on Network Sharing Center.
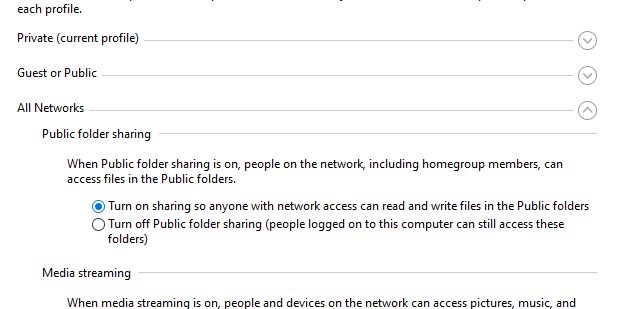
- Click on Change Advanced Sharing Settings .
- Now you will see an All Networks Option. Expand this by clicking the side arrow.
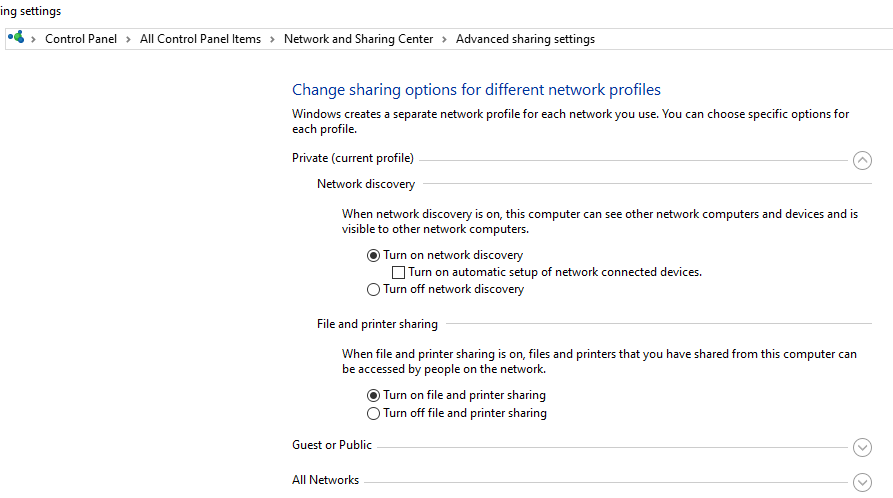
6. When the All Networks Option expands it looks like this the image attached below. In the Public Folder Sharing option, tick on the option- Turn on sharing so anyone with network access can read and write files in the Public folders.
7. In the Password protected sharing option, tick on the option- Turn off password protected sharing.
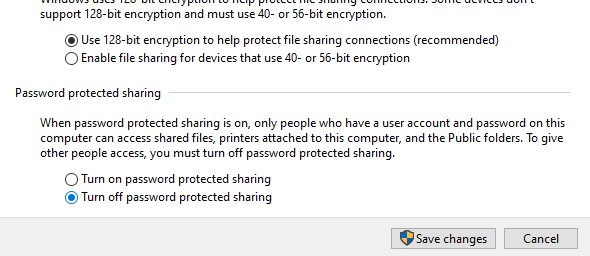
8. Click on Save changes after this. You will go back to the Network and Sharing Center option. In this, now you can view your active connections. In a section named View your Active Networks, you will see a network whose connections are showing as Ethernet, something like in the image below.
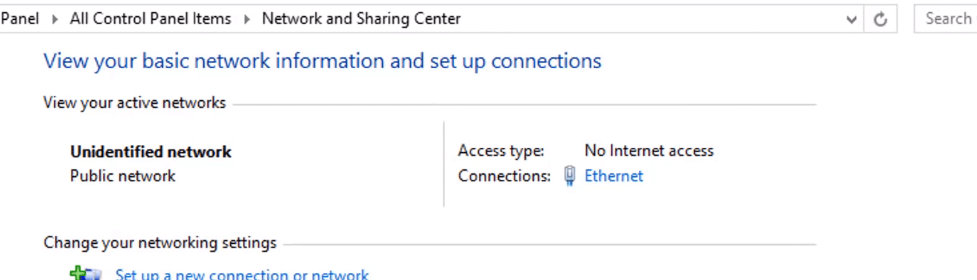
9. Double Click On this connections i.e. Ethernet . Now, click on the Properties of this pop-up box.
10. A pop-box will again open. Go to the Networking Tab of this pop-up box. Tick the option- Internet Protocol Version 4 (TCP/IPv4) .
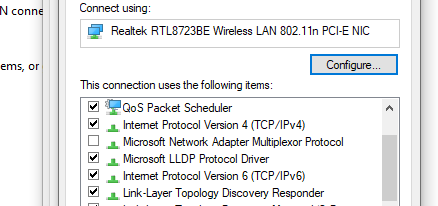
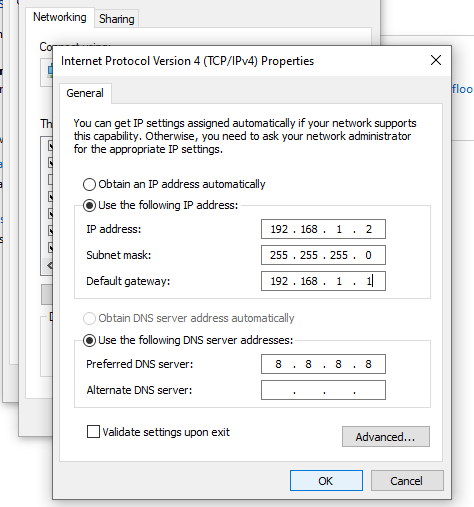
11. Double Click on Internet Protocol Version 4 (TCP/IPv4). A pop-up box will again open. Now we will assign an IP address to the system 1. Select on the option- Use the following IP addresses.
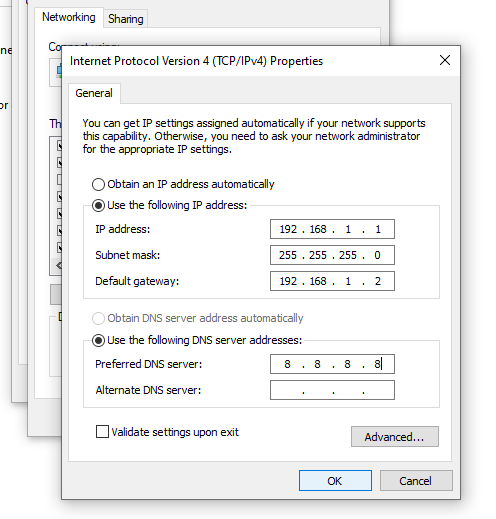
12. Fill the IP address as 192.168.1.1, Subnet Mask as 255.255.255.0 and the default gateway as 192.168.1.2. Choose the option- Use the following DNS server. In the preferred DNS server fill 8.8.8.8.
13. Now, we will open the second Computer and perform the steps from step 2 to Step 11 as above. The only change will be while filling the IP addresses i.e. for step 12.
14. Fill the IP address as 192.168.1.2, Subnet Mask as 255.255.255.0 and the default gateway as 192.168.1.1. Choose the option- Use the following DNS server . In the preferred DNS server fill 8.8.8.8. Here we are making the first computer as the default gateway for the second computer and in the 12th step, we made the second computer to act as a default gateway to the first computer.
15. Click on Ok and Close. Your systems are ready for file sharing.
16. You can see the Computer connected. Go to My Computer and Click on Network . Refresh and you can see the name of the first and the second Computer which are connected. Now, you can any file, audio, video that you want.
So we can connect two computers without using any hubs or routers. Hope you learned something new today.
Do share this blog with your friends to spread the knowledge. Visit our YouTube channel for more content. You can read more blogs from here .
Keep Learning :)
Team AfterAcademy!


